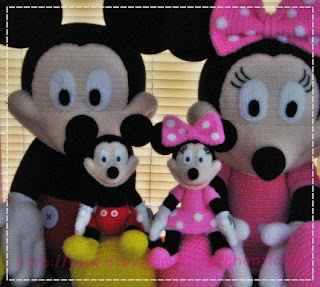
My melody FREE pattern
Size is approx. 3.5 inches from top of ears to toe, to get this size, you will need a cotton thread which is suitable for 1.5mm hook (US size = 8).
Alternatively, you can use any yarn with suitable hook and the size will be varies; of course a thicker yarn will get you a larger finished piece.
Head Cover
Head
RND 1: Beginning with white color, form an adjustable ring, work 6sc in centre of the ring, do not join; working in round, using a scrap of yarn to make end of every rounds ahead. (6)
RND2: 2sc in each st around. (12)
RND3: (sc in next st, 2sc in next st) rep 6times. (18)
RND4: (sc in next 2st, 2sc in next st) rep 6times. (24)
RND5: (2sc in next st, sc in next 3sts) rep 6times. (30)
RND6: (sc in next 4sts, 2sc in next st) rep 6times. (36)
RND7-9: sc in each st around. (36)
RND10: (sc in next 4sts, sc2tog) rep 6times. (30)
RND11: (sc in next 3sts, sc2tog) rep 6times. (24)
RND12: (sc in next 2sts, sc2tog) rep 6times. (18)
RND13: (sc in next 4sts, sc2tog) rep 3times. (15)
*Sl st in next st, fasten off and leave yarn tails approx. 25cm for sewing
*Stuff firmly
Head Cover
RND 1: Beginning with red or pink color, form an adjustable ring, work 6sc in centre of the ring, do not join; working in round, using a scrap of yarn to make end of every rounds ahead. (6)
RND2: 2sc in each st around. (12)
RND3: (sc in next st, 2sc in next st) rep 6times. (18)
RND4: (sc in next 2st, 2sc in next st) rep 6times. (24)
RND5: (2sc in next st, sc in next 3sts) rep 6times. (30)
RND6: (sc in next 4sts, 2sc in next st) rep 6times. (36)
RND7-11: sc in each st around. (36)
RND12: sc in first 5sts, dc in next 5sts, hdc in next 3sts, sc in next 15sts, hdc in next 3sts, dc in last 5sts. (36)
*Sl st in next st, fasten off and hide yarn ends.
*No stuff
Ears (Make 2)
RND 1: Beginning with red or pink color, form an adjustable ring, work 6sc in centre of the ring, do not join; working in round, using a scrap of yarn to make end of every rounds ahead. (6)
RND2: 2sc in each st around. (12)
RND3: (sc in next 4sts, 2sc in next st) rep 3times. (15)
RND4-8: sc in each st around. (15)
RND9: sc in first 13sts, sc2tog. (14)
RND10: sc in first 6sts, sc2tog, sc in last 6sts. (13)
RND11: sc in each st around. (13)
RND12: sc in first 11sts, sc2tog. (12)
*Sl st in next st, fasten off , leave yarn tail approx. 25cm for sewing.
*No stuff
Body
RND1: Beginning with white color, make 6chains, sc in first 4sts, 3sc in last ch, working on opposite side of starting ch, sc in next 3sts, 2sc in last chain, do not join; working in round, using a scrap of yarn to make end of every rounds ahead..(12)
*crochet first sc in second chain from hook*
RND2: 2sc in first st, sc in next 3sts, 2sc in next 3sts, sc in next 3sts, 2sc in last 2sts. (18)
RND3-6: sc in each st around. (18)
RND7: (sc in next 4sts, sc2tog) rep 3times. (15)
RND8: sc in each st around. (15)
*Sl st in next st, fasten off , hide yarn ends.
*stuff firmly.
Foot and leg (make 2)
RND1: Beginning with white color, make 5chains, sc in first 3sts, 3sc in last ch, working on opposite side of starting ch, sc in next 2sts, 2sc in last chain, do not join; working in round, using a scrap of yarn to make end of every rounds ahead..(10)
*crochet first sc in second chain from hook*
RND2: sc in each st around. (10)
RND3: sc in first 3sts, sc3tog, sc in last 4sts . (8)
RND8-10: sc in each st around. (10)
*Sl st in next st, fasten off , leave yarn tail approx. 15cm for sewing.
*stuff firmly lower foot firmly.
Arms (Make 2)
RND 1: Beginning with white color, form an adjustable ring, work 6sc in centre of the ring, do not join; working in round, using a scrap of yarn to make end of every rounds ahead. (6)
RND2-4: sc in each st around. (6)
*Sl st in next st, fasten off , leave yarn tail approx. 15cm for sewing.
*No stuff.
Tail
RND1: Beginning with white color, form an adjustable ring, work 5sc in centre of the ring, do not join; working in round, using a scrap of yarn to make end of every rounds ahead. (5)
RND2: sc in each st around. (5)
*Sl st in next st, fasten off , hide yarn ends.
*No stuff.
Collar
ROW1: Beginning with red or pink color, make 21chains, hdc in each chain across. (20)
*crochet first sc in second chain from hook*
*Leave yarn tail approx. 15cm for sewing
Assembly
1. Add head cover to head piece, no need to sew it together.
2. Keep ears in place with straight pins and sew
3. Cut eyes and nose out of felt and keep in place with glue
4. Embroider mouth.
5. Sew head and body together.
6. Join arm and leg together using a buttons to allow arm and leg movable. (Add stuff to foot area and fold and sew last rnd of leg/arm together befor join arm and leg)
7. Keep tail in place with glue
8. Add collar around neck area and sew in place
9. Tie a flower around left ear.
ENJOY!!
** flower pattern **
Beginning with pink color, form an adjustable ring, (chain 2, 2hdc, chain 2, 1sc) rep. 4 times, fasten off.


